Composting is a great way to enhance soil while also repurposing and minimizing home and garden waste. Our guide to compost & garden soil improvers explains in detail the nature, purpose, and benefits of using different types of compost.
But do you know how to make your own compost? This article explains the methods you can use to successfully turn organic waste into compost so that you can apply them at home.
Composting methods
Before we learn how to compost at home, we need to understand the different ways to approach it. Generally speaking, there are two methods: cold (passive) and hot (active) composting.
Cold or passive composting requires little or no maintenance but is slower to produce results. It takes place in regular outdoor temperatures. This is an anaerobic process because microorganisms that do not need oxygen break down the waste through fermentation. As you keep adding to the top of your pile, the material at the bottom will be ready to use. The pile does not to be aerated. Beware of diseased or insect-infested plants, or weeds that have gone to seed. Overall, decomposing takes up to a year or two, depending on the type of materials and the size of the particles.
Hot or active composting requires more involvement on your end but the process is faster. It depends on four elements: carbon, nitrogen, water, and air, where the carbon-to-nitrogen ratio is 2 to 1. This is considered aerobic composting since it’s oxygen-needing microorganisms that are at work. An adequately built pile will heat up and reach temperatures of over 60°C. It can kill any pathogens or weeds present in the pile. You need to regularly turn the pile to improve oxygen supply and add water to maintain moisture levels. In warm weather, you can get compost in one to three months.
Getting started
In order to set off to a good start, there are certain prerequisites you need to consider first: namely, when and where to compost.
When to compost
Composting can be done year-round. Of course, each season has its specifics. For example, the heat in the summer months speeds up the process, but you may need to help maintain moisture by adding more green materials such as grass or a little water. Autumn could be a great time to start a compost pile because of the abundance of fallen leaves, dead flowers, grass clippings, and other debris from the garden. In winter, the composting process slows considerably, but unless the temperatures fall below freezing, there will still be some activity. As temperatures begin to rise in spring, microorganisms are once again resume their hard work.
Regardless of the season, you can still continue to add kitchen waste layered with dry leaves. If you use hot composting, you could time your efforts in such a way as to have available compost ready at the end of the season (late autumn) or before the start of the new season (spring), the two most common times to apply it.
Where to compost
Choosing a compost bin


The first part of how to compost at home is choosing a suitable compost bin. There are several varieties of containers on the market, but you should consider things like: how much waste your household (or garden) produces, how much space you have available, and how much compost you need and how quickly.
Some of the more popular types of compost bins include:
- Plastic compost bin – These round bins have a lid on top and a hatch at the bottom. They are compact, durable, and great for protecting your compost from adverse weather. However, they’re difficult to turn and they don’t have any openings, which really hinders aeration.
- Plastic garden composter – These composters also come with a lid and hatch but also feature numerous openings to allow good airflow. They’re typically bigger than bins and fit more material, hence producing more compost.
- Compost tumbler – They make it very easy to turn your compost, plus they keep rodents out. On the downside, they’re more expensive and offer limited capacity.
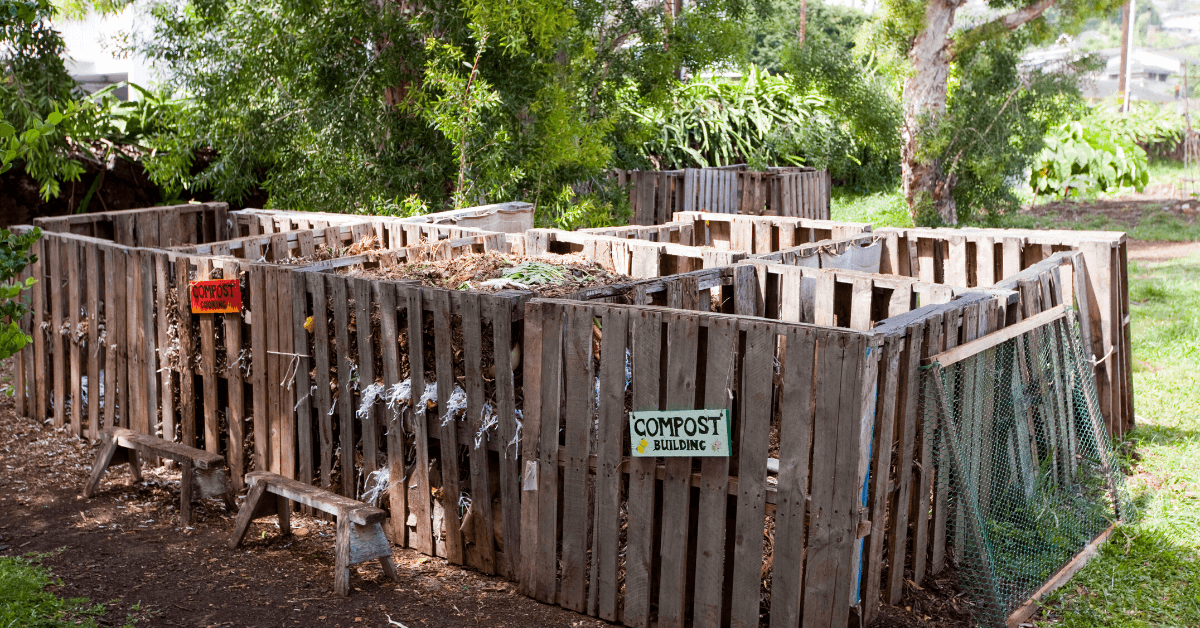
- Wooden composting bin – They don’t build up heat as effectively as plastic bins (especially if there are gaps), but are cheap and easy to make if you decide to build your own using old pallets, for example. You can construct them as big as needed for your designated spot. The ideal size for a compost heap is 1m x 1m x 1m.
- Other DIY alternatives – Some gardeners build composting bins using four posts with wire stretched outside, or by using different combinations of wood pallets and wire.
- Wormery – A ‘worm bin’ is made up of several compartments: a bottom one that collects liquid to be used as fertiliser and an upper one where the worms live and where the kitchen waste goes. These make great compost but are only suitable for small-scale composting because of their smaller size.
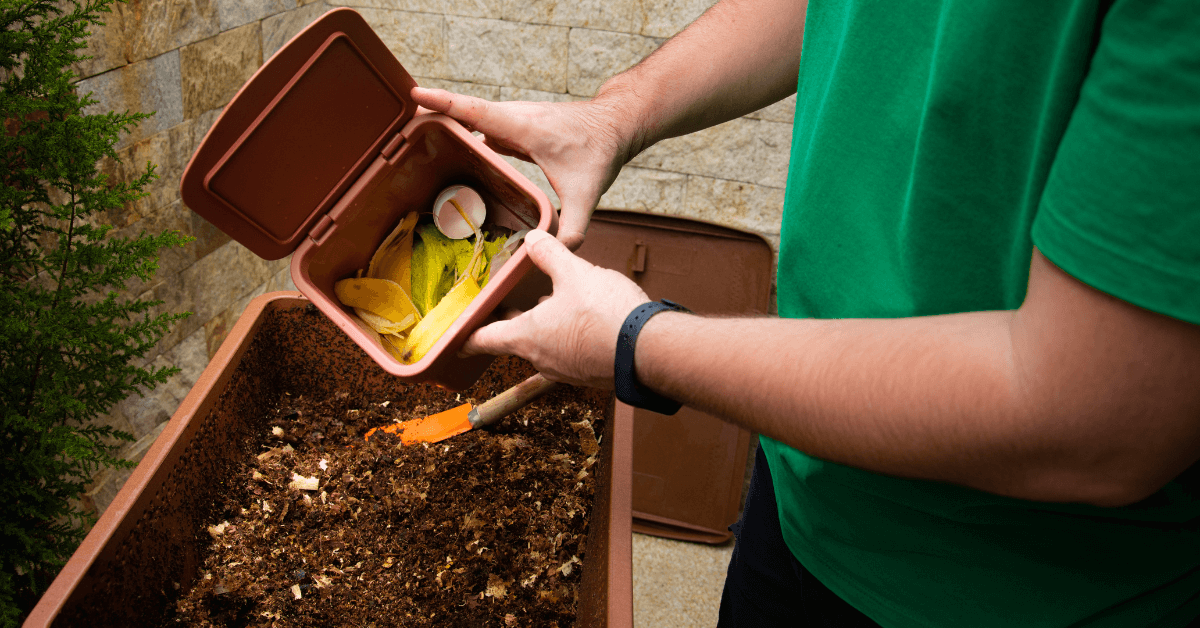
- Kitchen composting bins, e.g. bokashi – Sealed bokashi bins ferment kitchen waste (including dairy and meat) in an anaerobic process. It also produces liquid fertiliser. They’re almost odorless and very convenient for indoor use. They do, however, need inoculated bran to be mixed in.
Choosing a spot
Location, location, location. For an outdoor composter, it’s important to choose a suitable place in your yard. Pick a dry area that is not too cold, ideally in light shade or that gets a bit of sunshine. It needs to be level and well-draining too. Then, consider the distance to your house and to your garden. You want it to be far enough from the house, but not too far for you to walk to daily and empty your kitchen compost bin. Also, consider the fact that you’ll need to transport your finished compost to your plants – wheelbarrow or not, it can still involve quite a bit of work. Another thing to keep in mind is that you need to be able to reach your compost heap with a hose. Finally, unless you plan on using a portable compost tumbler, make sure the chosen location is going to be available for composting in the long term.
Step by step: hot compost
Here is how to make your own compost using the hot or active composting method:
- Place your compost bin so that it directly touches the soil. You can put a few centimeters of branches and twigs at the bottom of the pile for aeration.
- Combine green and brown materials. Some gardeners use a 1:1 ratio, while others recommend 3 parts brown to 1 part green.
– Brown materials (source of carbon): dried plants, fallen leaves, shredded tree branches, cardboard, newspaper, hay, straw, and wood shavings.
– Green materials (source of nitrogen): kitchen scraps, coffee grounds, and fresh plant and grass trimmings.
- Sprinkle water on top of the pile every few days. The recommended moisture levels are about 40-60%.
Moisture test: Take a handful of compost from the middle of the heap and squeeze it. It should feel like a sponge that has been wrung out. If water drips out, it’s too wet. If it crumbles, it’s too dry.
- Turn your compost pile
Tracking temperature: You can use a compost thermometer to monitor temperature and stir your pile when it goes below 55°C or above 70°C. To kill pathogens, you need to maintain 55°C for a minimum of 3 days.
- Collect your finished compost in several weeks and you should have dark brown, crumbly compost. The pile will appear noticeably smaller even though you were adding layers to it.
Step by step: cold compost
- Place your compost bin directly on the ground and put some brown material on the bottom.
- As you place new material, alternate green and brown layers. You should always end with brown material on top or bury kitchen scraps in the centre of the pile in order to deter pests.
- You can turn the compost every week or two before adding new green layers. However, it’s possible to skip this step entirely.
- If you go through months of dry weather, you could sprinkle some water on your compost. Skipping this is not an issue, your compost will simply
- Collect your compost. In about 4-6 months, you can open the hatch and check the bottom of the pile. You can remove your finished compost if it’s dark and friable, without any recognizable parts of the original scraps. It should have a nice, earthy smell and feel moist.
What not to put in a compost bin
Adding unsuitable materials can slow down the composting process or even contaminate the whole pile. You should avoid the following things:
- Meat, fish, and bones
- Dairy products, fats, oils, and whole eggs
- Plants and wood treated with pesticides
- Diseased or insect-infested plants
- Weeds that have gone to seed
- Baked goods and cooked grains
- Tea bags
- Coated cardboard and cellophane
- Treated lumber
- Dog or cat waste
Tips on how to speed up the composting process
- Cut the materials into smaller pieces or even shred them, as opposed to placing big chunks. Particle size plays an important part in how long it takes to make compost.
- Aerate the mixture about once a week using a shovel or spade. For plastic compost bins that are harder to turn, there are even specific tools on the market called ‘compost aerator’ or ‘compost turning tool’.
- Add a little bit of old compost or some soil to your new pile in order to introduce helpful bacteria.
- Keep the heat in: Cover with a compost duvet or tarp to prevent heat loss, especially in the early stages of decomposition. In the winter, you can insulate your compost bin by wrapping it with bubble wrap, styrofoam boards, pallets lined with cardboard, or another insulating material. Alternatively, you can purchase an insulated compost bin or use a tumbler to keep compost off the cold ground.
- Make a larger pile if you can. Piles smaller than 1m x 1m x 1m are more susceptible to the cool temperatures of the environment.
Common issues
Аt the end of the composting process, describe the main problems that arise during the process and how to know when a compost is ready;
- Too wet – This can result from adding too much green material and lead to sogginess and bad smells. To resolve the issue, dig out your compost entirely, turn the ingredients, and add in more brown material to balance out the moisture.
- Fresh grass clippings – Adding large batches of grass clippings at the same time can be problematic. Try to sprinkle them on your compost pile, making sure to compensate with brown material. If you have an excess of clippings, use them as mulch around fruit trees and bushes.
- Too dry – If your bin is too dry due to hot weather, sprinkle water evenly on your heap using a hose or watering can with a rose, while simultaneously mixing the materials. If your bin contains too many dry materials, you can dig out the ingredients, add green materials, and refill the bin.
- Bad odours – This indicates a nitrogen-carbon imbalance. If you’re sensing a distinct ammonia smell, there is too much nitrogen (green materials) in your pile. If that’s the case, you can add straw or brown leaves. If there is a smell of rotten eggs coming from your compost and you notice flies flying around, your pile needs some oxygen. Fix the issue by turning your pile, focusing on areas of food scraps that are clumped together.
Having learned about the different composting methods, bins, suitable materials, and tricks to solve common issues, you now know how to make your own compost. You are ready to set off on your journey to healthier soil.