What better time to start new seeds? The new year brings new year’s resolutions and for many of us, those have to do with gardening. Perhaps you’ve decided to minimize stress by spending more time in the garden? Perhaps your goal is to eat more homegrown fruit and vegetables? Learn how to start your own plants this year. From seeds to cuttings, find out useful tips about each method.
Propagation process, tips, ideas.
Propagation is the process of producing new plants. There are two types: sexual propagation involves seeds, while asexual propagation refers to using a single plant to create a new one (via cuttings or other methods).
How to propagate from seed
For most of their existence, seeds are dormant, waiting for favorable conditions. Propagating from seed requires the seed to break dormancy, otherwise, it cannot germinate. This can be achieved using several rooting techniques:
- Soaking – a common way to ‘wake seeds up’ by soaking them in tap water for about 8-12 hours in a covered container. Alternatively, you could spread seeds on one half of a coffee filter, fold the other half over them, moisten it, and place in a sealed ziplock bag for 24 hours.
- Scarification – involves breaking, scratching, or softening the coats of harder seeds. There is acid scarification where seeds are soaked in sulfuric acid; mechanical scarification where seeds are filed with a metal file, rubbed with sandpaper or cracked with a hammer; hot water scarification which involves soaking in hot water; and warm, moist scarification by placing seeds in nonsterile, warm, damp containers to slowly break down the coat.
- Stratification – involves chilling the seeds to simulate overwintering. This is needed for some fall-ripening trees and shrubs. The seeds are mixed with sphagnum moss/peat moss, or sand/vermiculite, and kept moist and refrigerated for 10-12 weeks. Afterward, they’re moved to a warm location in order to germinate.
How to propagate a plant from a cutting
This plant propagation technique allows you to create genetically identical plants to the mother plant, so it’s also referred to as cloning. It works for a wide variety of plants, especially those with sturdier stems (as opposed to stemless plants) and those that develop different branches (instead of a single stalk), also known as dicots.
There are different types of cuttings, such as:
- Stem cuttings – commonly used for ornamentals and woody shrubs
- Leaf cuttings – for houseplants, herbaceous plants (perennials, annuals, and biennials), as well as woody plants
- Root cuttings – for woody plants or perennials, taken while the plants are dormant.
Other methods
Some less common methods that may require more skill or are only used for a particular type of plants, include:
- Division – separating one large plant into several new ones
- Layering – encouraging shoots to form roots while still on the parent plant
- Grafting and budding – used in trees and shrubs to join plant parts so they grow as one plant, combining different qualities of the two original plants (e.g. flowering, fruiting, strong roots)
Starting from seeds
A popular and accessible way to start new plants, using seeds is common among beginners and expert gardeners alike.
How to pick seeds?
If you have some experience, you know that growing plants from seeds is not without its challenges. The first step in setting off to a good start is to choose the right seeds. Some factors you should keep in mind include:
- Are they annuals or perennials? This will determine whether your crops are going to be long-lived or would need replanting every year. Sowing and removing annuals requires a bit more work, but it lets you switch things around every year with new varieties.
- What thrives in your area? Consider what plants are common for your local climate, especially if you’re planning to grow your mature plants outdoors.
- How much space do they occupy? How deep do the roots go? Some plants require more room or depth than others. Using the guidelines on the back of seed packets, estimate what you can fit in your garden, in your greenhouse, or on your balcony.
That being said, there are some plant varieties that are ideal for growing from seed. These include fruits and vegetables with large seeds such as peas, beans, corn, squash, melon, and cucumbers. Although they’re small-seeded, carrots, beets, radishes, and turnips are also easy to grow and make a great choice for beginners. Novice gardeners can also try flowers such as poppies, zinnias, nasturtiums, marigolds, and petunias. On the other hand, leafy greens, tomatoes, peppers, eggplants, broccoli, and cauliflower tend to be more on the difficult side when it comes to growing from seed.
For urban gardeners: the best seeds to grow in the city
- beans
- beets
- chard
- kale
- lettuce
- spinach
- chili peppers
- onions
- radishes
- tomatoes
For families with kids: the best seeds to grow at home
- salad bowl lettuce
- mustard or cress
- beans
- carrots
- radishes
- chives and other herbs
- potatoes
For a piece of nature indoors: the best seeds to grow for fresh air
- Barberton daisy
- English ivy
- Chrysanthemum
- Moonflower
- Spider plant
- Aloe vera
- Broadleaf lady palm
- Dracaena
- Chinese evergreen
Tip: Seeds vs. seedlings – Unlike seeds, seedlings refer to young plants that have already sprouted from the seed. Growing plants from seedlings means purchasing tiny plants from a nursery. While it’s more expensive than using seeds, some gardeners choose this method because it eliminates some of the risks of seed germination and gives them a head start on certain crops.
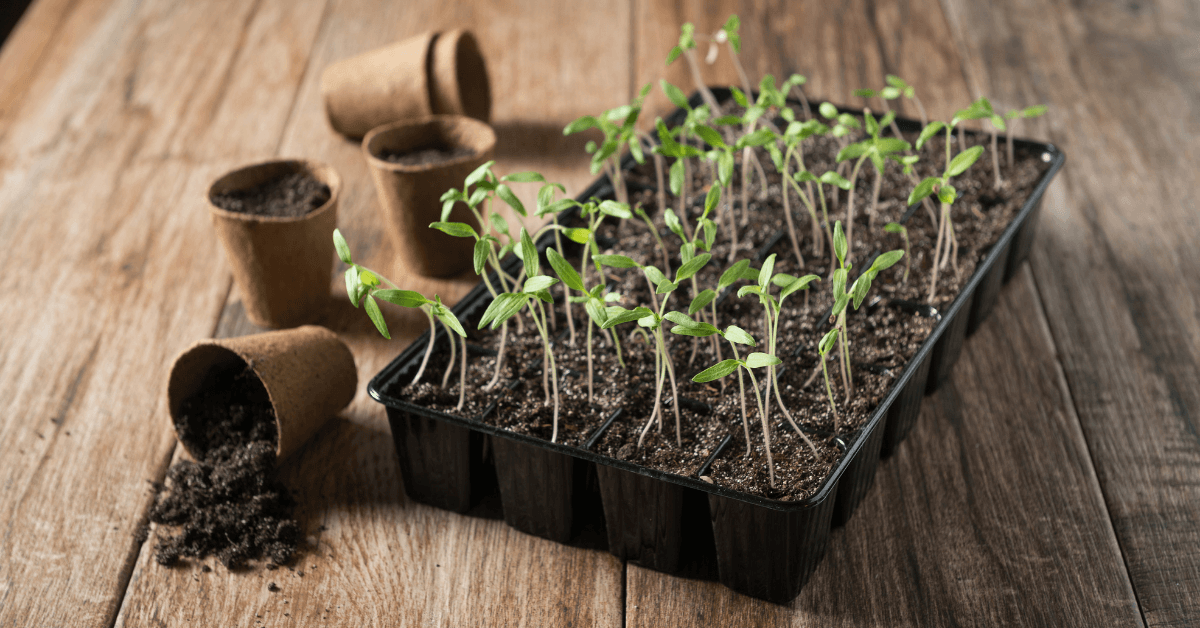
Supplies
- Seeds or seed tapes – Purchase enough seeds locally or online, keeping in mind that not all of them will germinate, and not all seedlings will be good enough to transplant. With seed tapes, the seeds are pre-sown into biodegradable tape and spaced at the correct distance for growing which can very useful with smaller seeds.
- Propagator – It creates an ideal environment for seed germination by maintaining favourable temperatures and retaining moisture. Ventilation slots in dome propagators allow fresh air in.
- Heated propagator or heat pad – These devices help keep the soil warm enough for germination which is important in how to grow a plant in need of warmer temperatures like tomatoes and chillies. You can place heated propagators virtually anywhere without having to heat an entire room or greenhouse.
- Growing medium such as rockwool grow cubes or potting mix.
Starting with cloning. Tips.
Cloning plants by using cuttings is another very common method of growing new plants. The greatest advantages of cloning plants include:
- You can replicate successful plants since you’re essentially copying the mother plant’s DNA.
- It’s cost-saving since no seeds or seedlings need to be purchased.
- It’s a quicker method than germinating because cuttings are more mature.
For the intricacies of how to grow plants from cuttings, follow the guidelines below:
Preparing for cloning
Choose a healthy, mature plant that doesn’t show any sign of disease. You can take numerous cuttings from the same mother plant, as long as there are sufficient branches left for it to support itself.
When to cut
Most stem cuttings can be rooted anytime the plants are actively growing. Softwood cuttings, which are taken from the soft young shoot tips in spring and early summer, are used for a wide range of perennials and deciduous shrubs. Greenwood cuttings are taken a bit later in the season and are suitable for berry fruits, boxwood, gardenia, etc. Semi-hardwood cuttings taken from midsummer to fall work for shrubs such as camellia and honeysuckle. In contrast, hardwood cuttings are taken in the dormant season and are used for deciduous shrubs, climbers, fruit, and trees.
Supplies
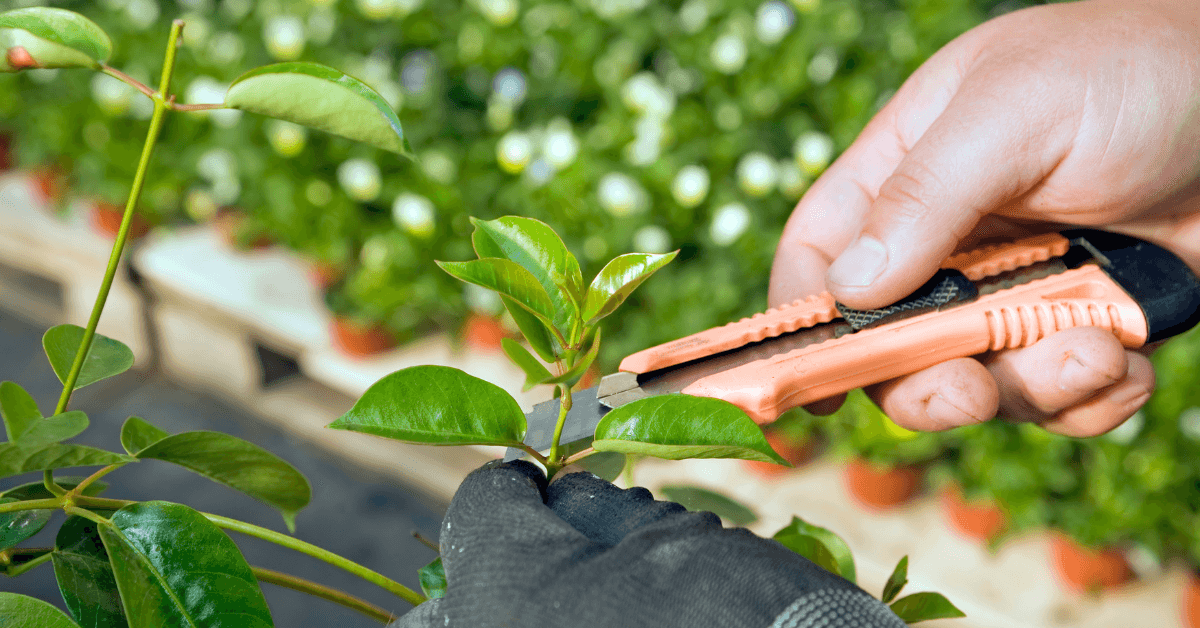
- Sharp knife or pruning shears – Clean and sterilize your tools prior to using them as new cuttings are prone to bacteria. Use hot, soapy water or apply a suitable disinfectant such as diluted bleach, isopropyl alcohol, etc. Make sure your cutting tools are sharp to avoid crushing the stem.
- Containers for the new cuttings – Growers can use anything from small pots, to plastic cups or clean yoghurt containers. Make sure there are drainage holes to remove excess water. Containers for rooting a cutting (including cuttings propagators) tend to be larger and deeper than those for seeds in order to sustain sufficient growth.
- Growing medium – This could involve rockwool cubes, potting mix, perlite, vermiculite, sand, water, or a cloning machine.
- Rooting hormone (gel/powder/liquid) – It boosts rooting by adding synthetic growth regulators – similar to auxins, rooting hormones found naturally in plants.
How to take a cutting from a plant
Select a vigorous branch that comes off from the main stem. Cut a section that is about 8 to 15 cm long. Make the cut at a 45-degree angle to create more surface area for root growth. Remove the bottom leaves and also partially trim the top leaves if they’re too large, so the plant doesn’t waste too much energy on photosynthesis.
Rooting and potting
You can choose to root your cuttings in several ways:
- In potting mix – Replant your cuttings in the pot immediately after cutting. Dip them in rooting hormone while the stem is still moist (if you choose to use it).
- In a rockwool cube – Soak the rockwool cubes in neutral water for a few hours, so they’re ready by the time you make your cuttings. Dip your cutting into a rooting hormone if desired prior to inserting it into the cube.
- In water – Place your cuttings in a glass or jar of water. Replace the water every few days to keep it fresh and clear. Once they root, you can move them into containers. This works especially well for soft-stemmed plants.
Caring for new clones
Keep your newly planted cuttings humid by placing clear plastic wrap on top of the containers, or using a humidity dome. Place the plants in bright but indirect sunlight. If no sufficient natural light is available, you can use grow lights after the first 1-2 days. Provide a warm environment with temperatures between 20°C-24°C. Plants potted in soil or rockwool cubes need to be misted daily. It can take up to several weeks for the plants to become strong enough to transplant to their permanent location.
Transplant seedlings: how to keep them growing
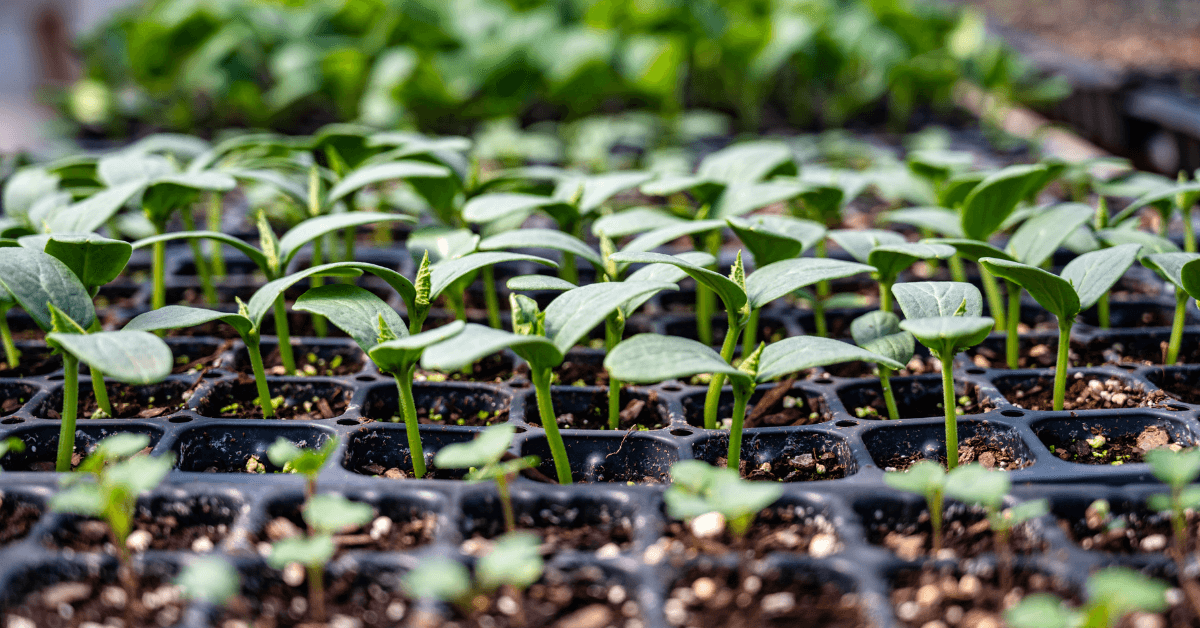
Once you’ve grown healthy young plants, it’s time to decide when to transplant them into the ground, a garden box, or bigger containers such as fabric pots.
When to transplant seedlings?
You can transplant seedlings once they have their first or second pair of true leaves, i.e. the leaves that resemble the parent plant. If you delay transplanting for too long and your plants outgrow their propagator or container, they may experience nutrient deficiency, unless you fertilize them regularly.
If planting outside, keep track of the weather forecast, especially nighttime temperatures, and look out for anticipated cold waves. Cool-season crops like lettuce, onions, beets, or peas can be planted outside when the soil reaches around 10ºC and is no longer cold and wet. On the contrary, warm-season crops like tomatoes and peppers need warmer temperatures in order to be transplanted outdoors.
Garden vs. pots
Plants can really thrive when planted directly into the ground, especially if they have access to rich soil. However, since seedlings are quite tender and demanding, raised beds are a good way to provide healthy, weed-free soil. Still, it’s best to wait a couple of weeks until after the last frost (depending on the plant variety) before sowing anything outdoors.
Cold frames offer a great way to protect plants from the cold. The transparent roof lets in light and can be lifted partially or entirely in sunny and warm weather.
Transplanting into pots gives you a bit more flexibility since you can move them indoors or outdoors as weather conditions change. However, containers do hold little soil, making plants more prone to temperature fluctuations.
Tip: Hardening Off Plants – To prepare the seedlings 1-2 weeks before transplanting them, harden them by placing them outside in a shaded, protected spot on warm days. Increase the amount of time gradually each day. Don’t forget to bring them in at night, although you can start leaving them out overnight after a while should the temperatures allow. Slightly decrease the frequency of watering to slow plant growth. These steps will help the transplants adapt to the outdoor conditions more easily and avoid shock.
How to transplant seedlings?
- Water the seedlings to keep the soil moist but not too soggy.
- Prick them out using a pencil, trying to keep as much of the original potting mix around the roots as possible. Hold plants by the leaves instead of the stems, as crushing the stem would be fatal.
- Have your individual pots or potting trays ready and filled up with multi-purpose compost. Note: to prevent a fungal infection called ‘damping off’, make sure you maintain good hygiene, using clean equipment and fresh compost.
- Make a hole using a dibber, creating enough room for the rootball and part of the stem, and lower the seedling into it.
- Tamp down the soil around the seedling very gently.
- Water the seedlings well, for example using a watering can with a fine rose in order not to damage them.
What do plants need to grow after transplanting?
Plants will need more care in the first two weeks after transplanting, so check on them daily and water them. You can water less frequently after that, but check the soil a few centimeters below the surface for dryness.
To protect plants, you can cover them with row cover or horticultural fleece. This will protect them from low temperatures, strong winds, and birds. Once the weather warms up, the covers can be removed. You can also take preventative measures against pests such as slugs and snails by adding a layer of eggshells, gravel, woodchip, or mulch. Some gardeners create further physical barriers by making slug collars from pieces of pipe, old plastic cups with lids, etc., or adding copper tape, slug-repellent paint, or an electric slug fence.
With these great tips on how to propagate a plant and take good care of your seedlings, we hope you’ll enjoy an abundance of delicious crops this year grown in your very own garden.